Azure Firewall is a great service, but it is also expensive. Building lab environments is time-consuming, and occasionally things are not managed 100% by the code. You want to avoid having to re-do the same configuration every time you need a firewall.
Good news. The Azure Firewall can be stopped (deallocated) and started (allocated) without impacting the firewall's configuration.
There are two types of provisioned firewall: one with forced tunneling and one without. Deallocating and allocating methods and similar but forced tunneled methods require an additional parameter.
Deallocating Azure Firewall
Deallocating effectively stops firewall and billing. Deallocation uses the method Deallocate() that is not available straight from powershell or CLI.
To deallocate firewall, simply run the following script, replacing <RG-Name> and <Firewall-Name> adequately.
$fw = Get-AzFirewall -ResourceGroupName <RG-Name> -Name <Firewall-Name>
$fw.Deallocate()
$fw | Set-AzFirewall
If you require more guidance, don't worry, I got you covered. 🤓
Step-by-step guide to deallocate (stop) Azure Firewall
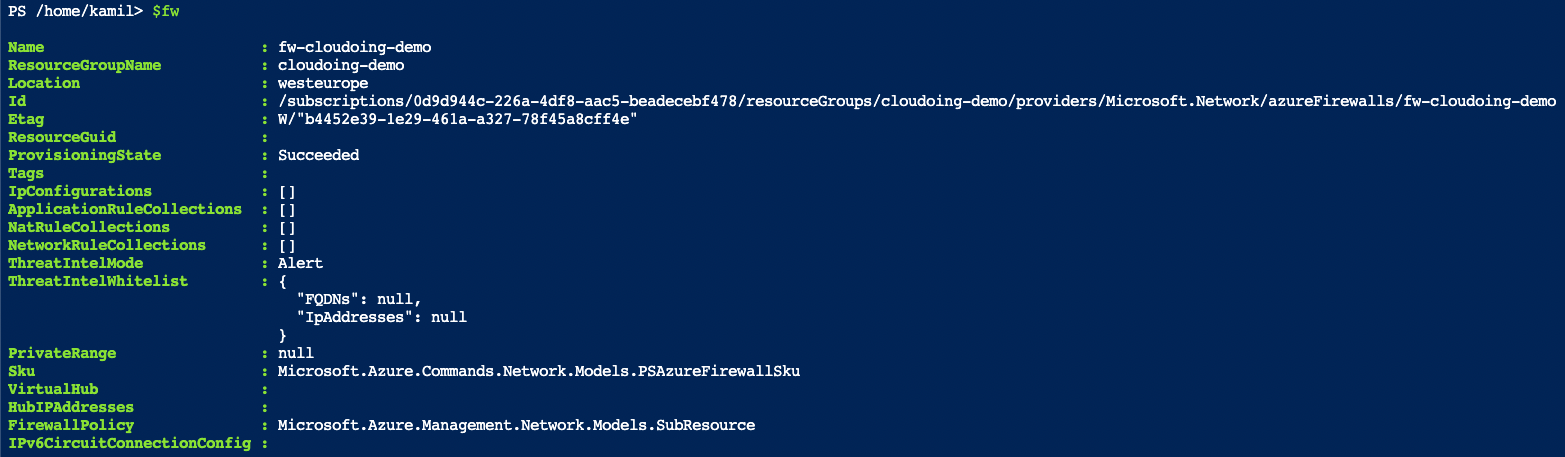
- Firstly, let's save firewall's properties to the variable called $fw. My firewall called fw-cloudoing-demo is present in resource group called cloudoing-demo.
Object $fw contains details about firewall resource. You can view its content by writing content of $fw.
2. To stop firewall Deallocate() method has to be called.
3. To finally stop the firewall, let's update firewall settings by passing $fw object to Set-AzFirewall command.
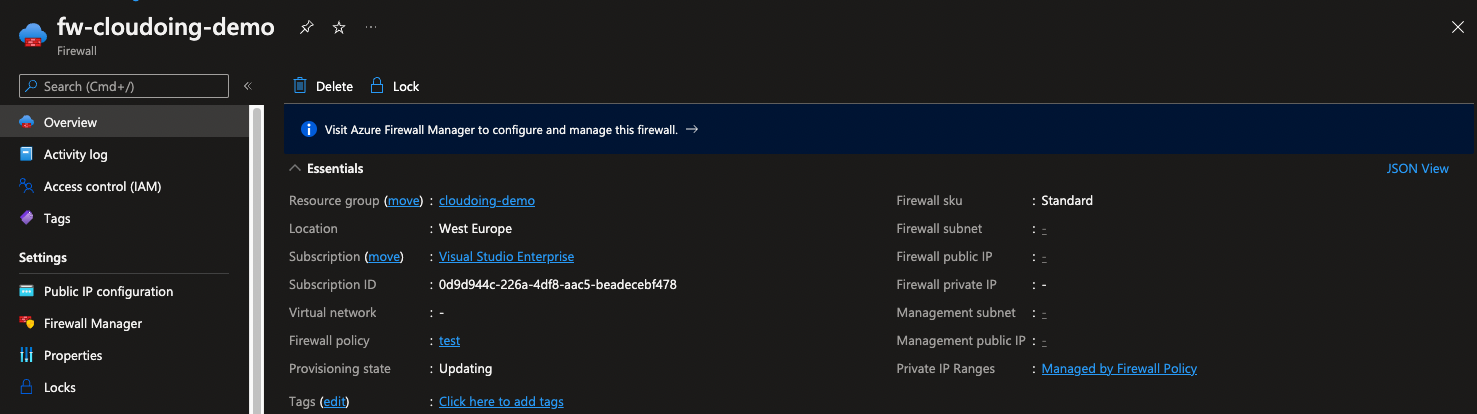
Right away, you will notice a difference. Firewall subnet, firewall public and private IP addresses are gone and provisioning state is “Updating”. If you do not see this, please ensure you called the Deallocate() method at the second step.
In less than 10 minutes, provisioning status will change to Succeeded. Azure Firewall and its billing operations are now stopped.
Allocating Azure Firewall
Depending on whether your firewall is configured for forced tunneling or not, there are slightly different scripts to allocate (start) the firewall back online.
$fw = Get-AzFirewall -ResourceGroupName <RG-Name> -Name <Firewall-Name>
$vnet = Get-AzVirtualNetwork -ResourceGroupName <RG-Name> -Name <Vnet-Name>
$ip = Get-AzPublicIpAddress -ResourceGroupName <RG-Name> -Name <IP-Name>
$fw.Allocate($vnet, $ip)
$fw | Set-AzFirewall
In case your firewall is configured for forced tunneling, the script differs slightly. Actually, it just requires one additional parameter to be passed – management public IP address.
$fw = Get-AzFirewall -ResourceGroupName <RG-Name> -Name <Firewall-Name>
$vnet = Get-AzVirtualNetwork -ResourceGroupName <RG-Name> -Name <Vnet-Name>
$ip = Get-AzPublicIpAddress -ResourceGroupName <RG-Name> -Name <IP-Name>
$manip = Get-AzPublicIpAddress -ResourceGroupName <RG-Name> -Name <Management-IP-Name>
$fw.Allocate($vnet, $ip,$manip)
$fw | Set-AzFirewall
Step-by-step guide to allocate (start) Azure Firewall
Similarly to stopping (deallocating) Azure Firewall, the procedure starts with saving resources details to variables. Deallocation process detaches the firewall from Virtual Network and IP address.
- Save your virtual network information to a variable. Passing virtual network details is enough, as the Azure Firewall always goes to a subnet called AzureFirewallSubnet.
2. Next thing is to get details about the firewall itself
3.
3.* In case your firewall is configured with forced tunneling save your management ip details to additional variable.
4. It's time to call a method Allocate passing Virtual Network's name as well as IP address that used to be attached to firewall.
For forced tunneling firewall it is required to assign additional management IP address. Therefore one additional parameter is required.
5. Finally let's start allocation (start) process by executing command
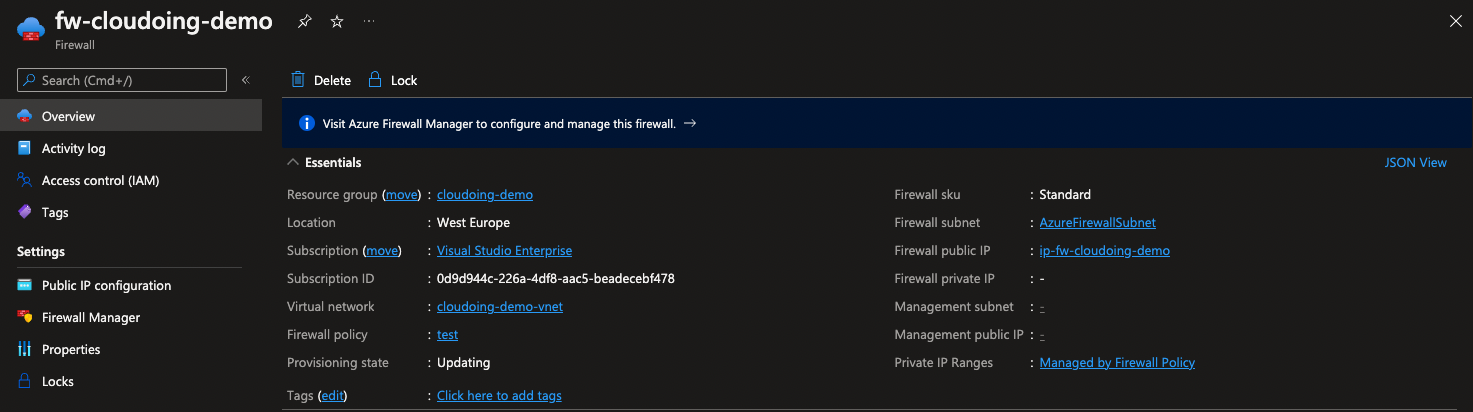
Go to the Firewall's overview. If everything is alright, the Firewall's provisioning state will change to "Updating". You can also see that firewall's subnet and IPs are present.
The provisioning process should be complete in a few moments. When the process is complete, the provisioning status will read 'Succeeded' and the firewall's private IP address will be visible.

Firewall is ready to go. Deallocation and allocation methods does preserve the configuration, so it's a perfect way to save a lot on firewall on labs or environments where systems do not have to be servicing all the time.
As everything in Azure, that action can be automated and run on schedule. A good way to do so would be to use an Azure Automation Account, as it can natively run PowerShell scripts.